Introduction
A kitchen workbench is an essential piece of furniture that enhances both the functionality and the aesthetic of your cooking space. Whether you are preparing meals, crafting, or tending to your plants, having a dedicated work area can significantly improve your workflow. In this article, we will delve into advanced techniques for constructing a highly functional kitchen workbench at home, focusing on joinery, precision, and achieving a professional finish.
Planning Your Kitchen Workbench
Before you start the construction process, it’s vital to plan your workbench carefully. Here are some key considerations:
- Dimensions: Consider the size of your kitchen and the space available for the workbench. A standard height is around 36 inches, but you may want to adjust this based on your personal comfort.
- Material: Select high-quality hardwood like maple or oak for durability and aesthetics. Plywood can be used for the top, but solid wood provides a more professional appearance.
- Functionality: Think about how you will use the workbench. Will it have storage? Do you need space for appliances? Make sure to incorporate these elements into your design.
Gathering Your Tools and Materials
Having the right tools is essential for precision and achieving a professional finish. Here is a list of tools and materials you will need:
- Table saw
- Router with edge guide
- Drill and drill bits
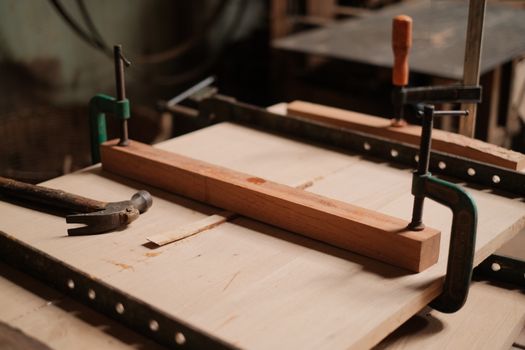
- Wood clamps
- Wood glue
- Screws and fasteners
- Sandpaper (various grits)
- Finish (oil, varnish, or polyurethane)
- Measuring tape and square
Advanced Joinery Techniques
Joinery is the backbone of furniture construction, and using advanced techniques will greatly enhance the strength and appearance of your workbench. Here are a few joinery techniques to consider:
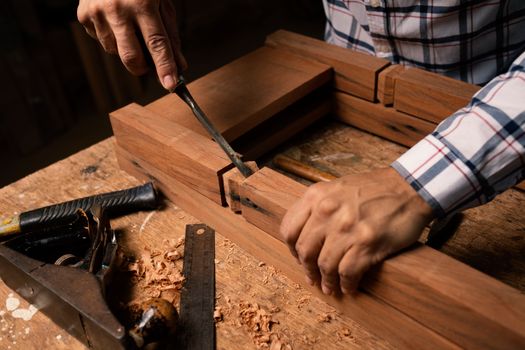
Mortise and Tenon Joints
This classic joint is known for its strength and durability, making it perfect for a kitchen workbench. To create a mortise and tenon joint:
- Mark the tenon on one piece of wood, typically the leg.
- Cut the tenon using a table saw or hand saw.
- Mark and cut the mortise in the corresponding piece, usually the bench top or the apron.
- Assemble the joint using wood glue and clamps, ensuring everything is square.
Dado Joints
Dado joints are ideal for adding shelves and support to your workbench. To create a dado joint:
- Set your table saw blade to the desired depth.
- Make multiple passes to remove material until the correct width and depth are achieved.
- Test fit your shelf to ensure a snug fit.
Box Joints
Box joints are another strong option, especially for drawer construction. These can be made using a dado stack or a router table with a box joint jig. Follow these steps:
- Cut the fingers on both pieces of wood, ensuring they interlock perfectly.
- Glue and clamp the pieces together until dry.
Achieving Precision in Construction
Precision is crucial when constructing your workbench. Here are some advanced tips to ensure your project is accurate:
- Double-check measurements: Always measure twice before cutting to avoid costly mistakes.
- Use a square: Ensure all joints and corners are square. This will help maintain the overall shape of your workbench.
- Bevel edges: Use a router to bevel the edges of your workbench top for a professional look.
Finishing Touches
A professional finish can elevate your workbench from a simple piece of furniture to a stunning focal point in your kitchen. Follow these steps for a beautiful finish:
- Sand the entire surface using progressively finer grits of sandpaper, starting from 80 grit up to 220 grit.
- Clean the surface with a tack cloth to remove dust.
- Apply your chosen finish (oil, varnish, or polyurethane) using a brush or clean cloth. Allow appropriate drying time between coats.
Final Assembly
Once all components are finished, it’s time to assemble your workbench. Ensure all joints are secure and the workbench is stable. If necessary, add a coat of finish to the edges after assembly for a seamless look.
Conclusion
Building a functional kitchen workbench at home is a rewarding project that improves your kitchen's usability while showcasing your woodworking skills. By employing advanced joinery techniques, ensuring precision, and applying a professional finish, you can create a workbench that meets your needs and elevates your space. For those seeking comprehensive plans and inspiration, consider checking out Ted Woodworking for a variety of woodworking plans.
FAQ
1. What type of wood is best for a kitchen workbench?
Hardwoods like maple, oak, or beech are ideal due to their durability and resistance to wear and tear.
2. How can I ensure my workbench is stable?
Make sure to use strong joinery techniques and level all legs before securing the top. Adding a lower shelf can also increase stability.
3. What finish is best for a kitchen workbench?
A food-safe finish such as mineral oil or a polyurethane sealant is recommended for durability and easy cleaning.
📚 Related Articles
🔨 Want 16,000+ Woodworking Plans?
Get instant access to step-by-step plans with blueprints and cut lists.
Get Instant Access →