How to Craft a Personalized Wooden Name Sign for Your Bedroom
Personalized wooden name signs are an excellent way to add a touch of individuality to your bedroom. Whether you want to customize your space or create a thoughtful gift, crafting a wooden name sign is a rewarding project. In this article, we'll guide you through the process step-by-step, highlighting common mistakes to avoid and offering troubleshooting tips along the way.
Materials and Tools Needed
Before diving into the crafting process, gather the necessary materials and tools:
- Wood: Choose a suitable type of wood, such as pine, cedar, or plywood.
- Wood Glue: Essential for attaching parts together.
- Paint or Stain: For finishing your sign.
- Brush or Spray Paint: For applying your finish.
- Saw: A jigsaw or band saw will work well for cutting shapes.
- Sander: To smooth out edges and surfaces.
- Drill: For making holes if needed for hanging.
- Stencil or Vinyl Cutter: For creating letters and shapes.
- Measuring Tape: To ensure accurate measurements.
- Safety Gear: Always wear goggles and a dust mask while working.
Step-by-Step Instructions
1. Design Your Sign
Before you start cutting wood, sketch out your design. Decide on the size, font, and layout of your name sign. You can use software or a simple piece of paper:
- Consider the size of your bedroom and where the sign will be placed.
- Choose a font that reflects your personality—cursive, bold, or minimalist.
- Remember to leave space for decorative elements if desired.
2. Prepare the Wood
Once you have your design, it's time to prepare the wood:
- Measure and cut the wood according to your design dimensions.
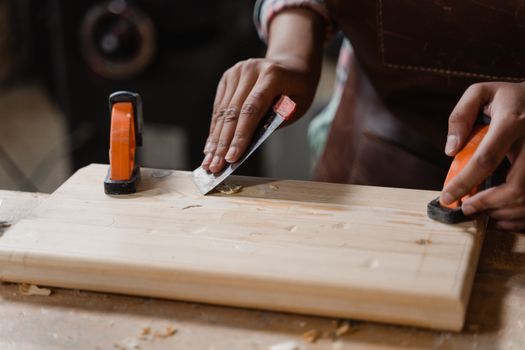
- Sand the edges and surfaces to prevent splinters.
- Consider using a wood conditioner if staining for a uniform finish.
3. Create the Letters
There are various ways to create letters for your sign:
- Stencil Method: Print your letters on paper, cut them out, and trace them onto the wood.
- Vinyl Cutter: If you have access to one, this is a great way to create clean, precise letters.
- Hand-Painting: For a more personal touch, you can freehand paint your letters.
4. Cut Out the Letters
Use a jigsaw or band saw to carefully cut out your letters. Here are some tips:
- Make sure your saw blade is appropriate for the thickness of your wood.
- Keep your hands clear of the blade, and always follow safety guidelines.
- If you encounter splintering, consider using painter's tape along the cut lines to reduce tear-out.
5. Assemble the Sign
Once you have your base and letters, it's time to assemble the sign:
- Position the letters on the base according to your design.
- Use wood glue to attach the letters securely to the base.
- Clamp the pieces together and allow the glue to dry as per the manufacturer's instructions.
6. Finish the Sign
Now it’s time to add the finishing touches:
- Paint or stain the sign to your desired color.
- Consider adding a protective clear coat for durability.
- If you plan to hang the sign, drill appropriate holes for mounting.
7. Troubleshooting Common Mistakes
Even experienced woodworkers can encounter issues. Here are some common mistakes and how to fix them:
- Inaccurate Measurements: Always double-check your measurements before cutting. If you cut too small, you may need to start over or use wood filler for minor adjustments.
- Uneven Edges: If your cuts are not smooth, sand them down until they are even. A belt sander can be particularly effective for larger sections.
- Glue Not Holding: Ensure you have applied enough glue and given it adequate time to dry. If the letters fall off, reapply glue and clamp them securely.
- Painted Finish Not Even: If your paint job is streaky, consider sanding lightly between coats for a smoother finish.
- Sign Too Heavy for Mounting: If the sign is too heavy, consider using stronger mounting hardware or reducing the sign's size.
8. Final Touches
Once you’ve completed your sign, give it a final inspection. Make sure everything is secure and that the finish is exactly how you want it. Place your personalized wooden name sign in your bedroom, and enjoy your unique piece of decor!
For those looking for more woodworking plans and ideas, check out Ted Woodworking for a variety of resources and projects.
Conclusion
Crafting a personalized wooden name sign for your bedroom is a fulfilling project that adds a personal touch to your space. By following these steps and being mindful of common mistakes, you can create a beautiful piece that reflects your style.
FAQ
1. What type of wood is best for a name sign?
Pine, cedar, and plywood are popular choices due to their workability and aesthetic appeal. Choose a type that suits your style and budget.
2. Can I use a laser cutter instead of a saw?
Yes, a laser cutter can provide precise cuts and intricate designs. Ensure you have the proper setup and safety measures in place.
3. How do I hang the sign securely?
Use appropriate wall anchors for the weight of your sign. If necessary, consider using a French cleat system for added stability.
📚 Related Articles
🔨 Want 16,000+ Woodworking Plans?
Get instant access to step-by-step plans with blueprints and cut lists.
Get Instant Access →