Introduction
Building your own shelves can be a rewarding project that not only saves you money but also allows you to customize your storage solutions to fit your space perfectly. In this article, we will dive into the most affordable ways to build DIY shelves, focusing on advanced joinery techniques, precision, and achieving a professional finish.
Materials Selection
Choosing the right materials is crucial for both cost-effectiveness and durability. Here are some budget-friendly options:
- Plywood: High-quality plywood is a great choice for shelves, providing strength and a smooth surface for finishing.
- Solid Wood: Look for offcuts or reclaimed wood. Pine is often the most affordable solid wood option.
- Melamine: For a more modern look, melamine boards are affordable and come in various finishes.
Essential Tools
Before starting your DIY shelf project, ensure you have the right tools. You don’t need high-end equipment; just the essentials will do:
- Measuring Tape: Precision starts with accurate measurements.
- Square: A carpenter's square will help ensure your angles are perfect.
- Router: For creating clean edges and joinery.
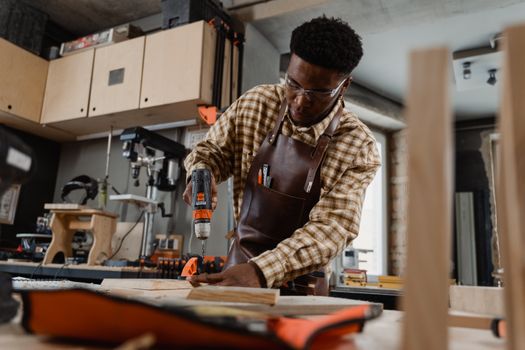
- Drill: For making pilot holes and fastening pieces together.
- Saw: A circular saw or a table saw will give you the most precision.
Joinery Techniques for Strong Shelves
The strength of your shelves will depend significantly on the joinery techniques you choose. Here are a few advanced methods that are both affordable and effective:
1. Pocket Hole Joinery
Pocket hole joinery is a fantastic technique for creating strong, hidden joints. It is also straightforward to execute with a pocket hole jig. Here’s how to do it:
- Set up your pocket hole jig according to the thickness of the wood.
- Drill pocket holes at the ends of the shelf supports.
- Align the pieces and screw them together using wood screws. This method provides a clean look without visible hardware.
2. Dado Joints
Dado joints are another excellent choice for shelf construction, providing a robust connection between the shelf and the side panels. Follow these steps:
- Measure where you want the shelves to sit and mark your side panels.
- Using a table saw, cut a groove (dado) into the side panels to the depth of the shelf.
- Insert the shelf into the dado and secure it with wood glue or screws for added strength.
3. Rabbet Joints
Rabbet joints are ideal for attaching the back panel to the shelf structure, which can increase stability. The process is as follows:
- Cut a rabbet along the edge of the back panel to fit into the side panels.
- Glue the back panel to the rabbet joint, ensuring everything is square.
- Clamp and let the glue dry before moving on to finishing.
Finishing Techniques for a Professional Look
Once your shelves are assembled, it’s time to focus on the finish. Here are some techniques to achieve a professional look:
1. Sanding
Start with a coarse grit sandpaper and work your way up to a fine grit. Sanding not only smooths the surface but also prepares it for finishing.
2. Staining and Sealing
Choose a wood stain that complements your decor. Apply it evenly with a foam brush, and once dry, seal it with polyurethane for protection.
3. Edge Banding
If you used plywood or melamine, consider applying edge banding to give your shelves a more finished appearance. This step can elevate the overall look significantly.
Cost-Effective Tips
To keep your costs low while building DIY shelves, consider the following tips:
- Buy materials in bulk or during sales.
- Use recycled materials whenever possible.
- Plan your project carefully to minimize waste.
Resource for Plans
If you’re looking for detailed plans to get started on your DIY shelving project, Ted Woodworking offers a vast collection of free and paid plans that can guide you through the process.
Conclusion
Building DIY shelves can be an excellent way to enhance your home’s organization while also saving money. By utilizing advanced joinery techniques, precision measurements, and professional finishing methods, you can create beautiful, strong shelves that fit your style and needs. With the right planning and resources, your dream shelving unit is just a project away!
FAQ
1. How much does it cost to build DIY shelves?
The cost can vary greatly based on materials, but a simple set of shelves can be made for under $50 if using budget materials.
2. What tools do I need for building shelves?
Basic tools like a measuring tape, drill, saw, and router are essential for building quality shelves.
3. Can I use old wood for my DIY shelves?
Absolutely! Reclaimed wood can add character and save costs, but ensure it is structurally sound before using it.
📚 Related Articles
🔨 Want 16,000+ Woodworking Plans?
Get instant access to step-by-step plans with blueprints and cut lists.
Get Instant Access →