Introduction
Are you struggling to find storage solutions for your small bedroom? Building your own adjustable wooden bookshelf could be the perfect answer! Not only will it save space, but it will also add a personal touch to your decor. In this beginner-friendly guide, we will walk you through the process of creating a simple yet functional bookshelf using basic tools and materials.
Materials Needed
- 3/4 inch plywood or solid wood boards (for the shelves and sides)
- Wood screws or dowels
- Wood glue
- Adjustable shelf pins
- Sandpaper (80, 120, and 220 grit)
- Wood finish or paint (optional)
- Wood clamps
- Measuring tape
- Square
- Pencil
- Drill
- Saw (circular or hand saw)
Step-by-Step Guide
Step 1: Planning Your Bookshelf
Before you start cutting wood, take some time to plan the dimensions of your bookshelf. Consider the height, width, and the number of shelves you want. A typical bookshelf might be around 5-6 feet tall and 3-4 feet wide, but adjust these measurements to fit your space.
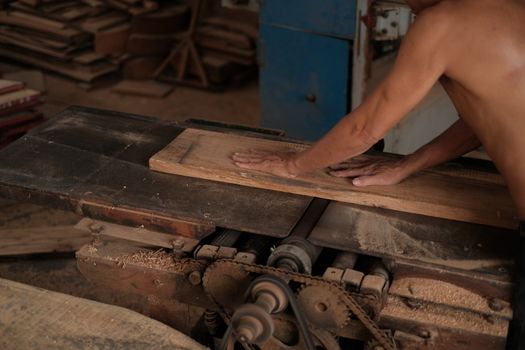
Step 2: Cutting the Wood
Using your saw, cut the plywood or solid wood into the following pieces:
- 2 pieces for the sides (e.g., 72 inches tall by 12 inches wide)
- 2 pieces for the top and bottom (e.g., 36 inches wide by 12 inches deep)
- Several pieces for the shelves (e.g., 36 inches wide by 10 inches deep, depending on your needs)
Ensure all cuts are straight and measure twice before cutting to avoid mistakes.
Step 3: Sanding the Edges
After cutting the wood, use sandpaper to smooth all edges and surfaces. Start with 80 grit sandpaper and work your way to 220 grit for a fine finish. This will help prevent splinters and give your bookshelf a polished look.
Step 4: Assembling the Frame
Begin by attaching the top and bottom pieces to the side pieces. Use wood glue along the edges and secure them with wood screws or dowels. Make sure everything is square by checking the corners with a square tool. Use wood clamps to hold the frame in place as the glue dries.
Step 5: Adding the Shelves
Decide on the placement of your adjustable shelves. Mark the desired heights on the side panels, ensuring they are level. Drill holes for the adjustable shelf pins at each marked spot. Insert the pins and place the shelves on top. This allows you to customize the height of the shelves based on your storage needs.
Step 6: Finishing Touches
Once the glue has dried and everything is assembled, it’s time to finish your bookshelf. You can either paint it or apply a wood finish to enhance its natural beauty. Allow sufficient drying time according to the product instructions.
Step 7: Final Assembly and Placement
After the finish has dried, move the bookshelf into your bedroom and secure it to the wall with brackets for safety, especially if you plan to store heavy items. Arrange your books and decorative items, and enjoy your new space-saving solution!
Where to Find Plans
If you are looking for more detailed plans or variations for your adjustable bookshelf, consider checking out Ted Woodworking. They offer a wide range of woodworking plans that can help you create furniture tailored to your specific needs.
Conclusion
Building an adjustable wooden bookshelf is a rewarding project that can significantly improve the functionality of your small bedroom. With just a few basic tools and materials, you can create a beautiful piece of furniture that fits your style and storage requirements.
FAQs
1. How much does it cost to build a bookshelf?
The cost can vary depending on the materials you choose, but generally, you can build a simple bookshelf for around $50 to $150.
2. Do I need advanced woodworking skills to build this bookshelf?
No, this guide is designed for beginners. Basic skills and tools are sufficient to complete the project successfully.
3. Can I customize the bookshelf size?
Yes! You can adjust the dimensions of the bookshelf based on your available space and storage needs.
📚 Related Articles
🔨 Want 16,000+ Woodworking Plans?
Get instant access to step-by-step plans with blueprints and cut lists.
Get Instant Access →